
Step-by-Step: Making Your First Liquid Culture from Scratch
Introduction to Liquid Cultures
Liquid cultures may sound complicated, but the idea is actually pretty simple. A liquid culture is a sterile liquid nutrient solution used to expand mushroom mycelium before transferring it to grain or another growing medium. Instead of growing only on a solid surface like agar, the mycelium grows suspended throughout the liquid.
Think of it as a lightly nutritious broth that gives mushroom mycelium a clean place to expand. Once healthy growth develops, the liquid culture can be drawn into a sterile syringe and used to inoculate grain, jars, or bags.
Liquid culture can be an efficient way to speed up colonization, stretch clean genetics further, and reduce the amount of time it takes to expand a culture. That said, cleanliness is everything. Liquid culture can be very useful, but it can also hide contamination if it is not prepared and tested properly.
Essential Materials Needed for Making Liquid Cultures
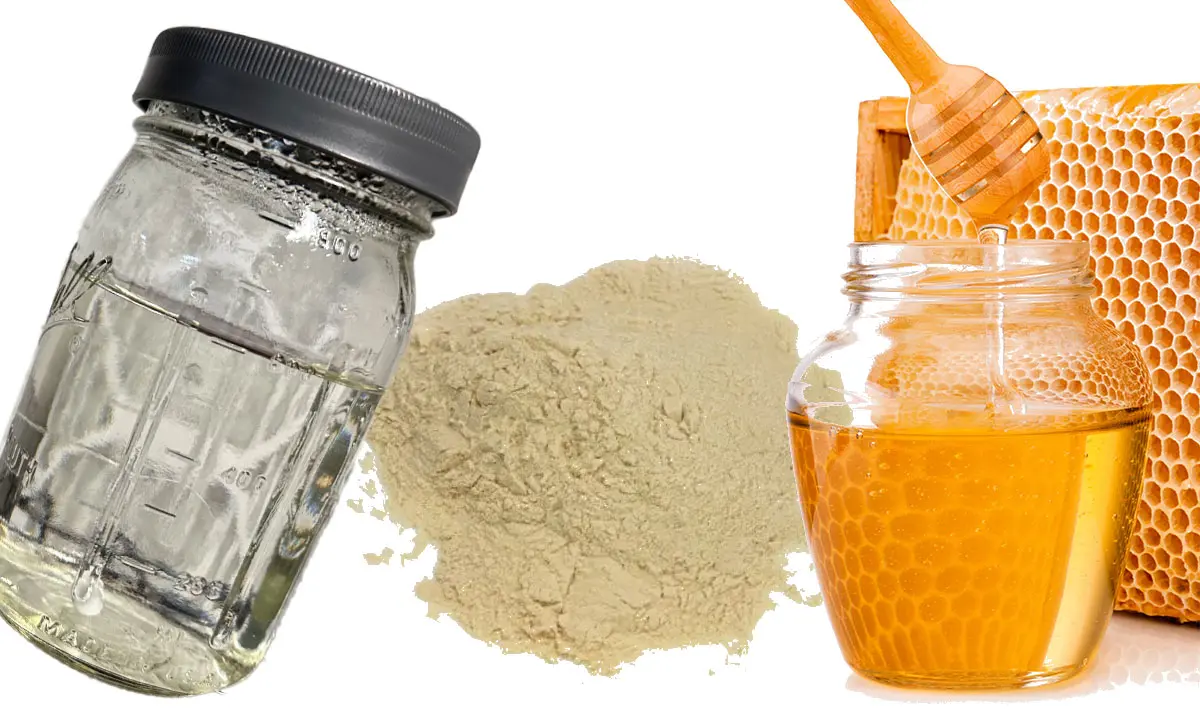
To start making liquid culture, you only need a few basic items. You will need a sterile jar or media bottle to hold the liquid culture solution, a modified lid or injection port, a syringe and needle for inoculation, and a nutrient source such as light malt extract, honey, or light corn syrup.
You will also need a pressure cooker or autoclave to sterilize the liquid culture solution. Sterilization is one of the most important steps because any bacteria, mold spores, or wild yeast left behind can quickly take over the jar.
When inoculating your liquid culture, it is best to work in a still air box, in front of a laminar flow hood, or in the cleanest still-air environment possible. Liquid culture is sensitive because contamination can spread through the entire solution very quickly.
- Jar or media bottle – Holds the liquid culture solution.
- Modified lid or injection port – Allows clean inoculation and gas exchange.
- Syringe and needle – Used to inject or draw up liquid culture.
- Light malt extract, honey, or Karo syrup – Provides a simple food source.
- Pressure cooker or autoclave – Sterilizes the solution.
- Still air box or laminar flow hood – Helps reduce contamination during transfers.
Choosing the Right Nutrient Solution for Your Liquid Culture
One of the biggest misconceptions beginners run into with liquid culture is thinking that more nutrients will automatically create faster or better growth. In reality, overly rich liquid culture recipes can cause problems such as excess sediment, caramelization during sterilization, bacterial blooms, and cloudy cultures that are harder to inspect.
Most experienced growers prefer a lower nutrient liquid culture solution. Lower nutrient levels often produce cleaner growth, healthier mycelium, and make contamination easier to spot early.
Common nutrient sources include:
- Light Malt Extract – A popular choice because it provides a balanced nutrient source for mycelium.
- Honey – Simple and easy to find, though it can sometimes create more sediment.
- Karo Syrup / Light Corn Syrup – Very clear and easy to monitor visually.
A good beginner-friendly recipe is:
- 500mL water
- 5–10 grams light malt extract
or:
- 500mL water
- 5–10 grams honey or light corn syrup
This creates roughly a 1–2% nutrient solution, which is a great range for most liquid culture work. Stronger recipes, such as 4% sugar solutions, are often more nutrient-heavy than necessary and may increase the chances of bacterial growth, thick cloudiness, or caramelization during sterilization.
The goal is not to make the richest possible broth. The goal is to create a clean, lightly nutritious solution that supports healthy mycelial growth while remaining easy to inspect.
What We Use
There are countless liquid culture recipes out there, but after years of testing different nutrient sources and concentrations, we personally prefer running a very light nutrient solution. In our experience, lower nutrient liquid cultures tend to stay cleaner, recover faster, and make contamination easier to identify compared to overly rich recipes.
This is one of the simple recipes we regularly use in-house:
- 1.5g Light Malt Extract (LME)
- 1g Dextrose
- 600mL Distilled Water
- Sterilize for 20 minutes at 15–16 PSI
This creates a very light nutrient solution that still supports healthy mycelial growth while remaining relatively clear and easy to inspect. We intentionally avoid heavily concentrated liquid culture recipes because excessive sugars and nutrients can sometimes encourage bacterial growth, create cloudy solutions, or caramelize during sterilization.
One important thing to understand is that liquid culture is not about creating the fastest possible growth inside the jar. The real goal is producing clean, healthy mycelium that can later colonize grain aggressively and consistently.
You may find that different species or genetics prefer slightly different nutrient levels, but simple low nutrient recipes like this are often an excellent starting point for beginners and experienced growers alike.
Preparing the Liquid Culture Solution
Preparing liquid culture media is simple. You are basically creating a sterile, lightly nutritious solution for mycelium to grow in.
- Start with approximately 500mL of water. Distilled water is ideal, but clean drinking water can also work.
- Add 5–10 grams of light malt extract, honey, or light corn syrup.
- Mix thoroughly until the nutrient source is fully dissolved.
Try not to overdo the nutrient source. Too much sugar can slow growth, encourage bacteria, create excess sediment, and make the liquid culture harder to visually inspect.
Clearer liquid culture solutions are usually preferred because they allow you to see the difference between healthy mycelial growth and possible contamination.
Once mixed, the solution needs to be sterilized.
- Pour the solution into jars or media bottles with modified lids or injection ports.
- Do not fully tighten the lids during sterilization. Slightly loose lids help prevent pressure buildup.
- Sterilize at 15 PSI for 15–20 minutes using a pressure cooker or autoclave.
Avoid over-sterilizing sugary liquid culture media. Long sterilization times can darken the solution and caramelize sugars, which may negatively affect growth.
After sterilization, allow the jars or bottles to cool completely before inoculating.
Sterilizing Equipment and Materials for Your Culture
Before making liquid culture, it is important to understand that cleanliness is everything. Every jar, lid, syringe, needle, and tool should be as clean and sterile as possible before use.
Your liquid culture solution should be sterilized in a pressure cooker or autoclave. Any tools that will directly contact the culture should also be sterile. If using a needle, flame sterilize the needle until it is red hot before inoculation, then allow it to cool briefly before inserting it into the injection port.
Do not leave sterile tools sitting out in open air. Keep them covered, wrapped, or inside a clean workspace until you are ready to use them. When working with liquid culture, quick and deliberate movements help reduce exposure to airborne contaminants.
Contamination can happen fast in liquid culture because bacteria or mold spores can spread throughout the entire jar. Taking your time during sterilization and inoculation gives your culture the best chance of success.

Inoculating Your Liquid Culture: A Step-by-Step Guide
Once your liquid culture solution has been sterilized and fully cooled, it is ready to inoculate. Inoculation means introducing clean spores, liquid culture, or mycelium into the sterile liquid solution.
Before starting, clean your workspace thoroughly. Work in a still air box, in front of a laminar flow hood, or in the cleanest still-air environment possible. Wipe down surfaces, wear gloves, and avoid unnecessary movement while working.
- Shake your spore syringe or liquid culture syringe gently to distribute the contents evenly.
- Flame sterilize the needle until red hot.
- Allow the needle to cool briefly.
- Wipe the injection port with 70% isopropyl alcohol.
- Insert the needle through the injection port.
- Inject approximately 1–2cc into the liquid culture solution.
- Remove the needle and store the jar in a stable area away from direct sunlight.
Aim the liquid down the side of the jar if possible. This can make early growth easier to observe.
After inoculation, store the jar at a stable room temperature. Many cultures show visible growth within several days to a couple of weeks, depending on genetics, temperature, and the inoculation source.
Understanding Healthy Liquid Culture Growth
Healthy liquid culture growth usually begins as small wispy strands, tiny floating clumps, or cotton-like mycelium forming in the liquid. Over time, the mycelium may become thicker and more visible throughout the jar.
Healthy growth may appear as:
- Wispy white strands
- Small floating clusters
- Cloud-like mycelial growth
- Ropey or rhizomorphic formations
- White mycelium suspended in otherwise clear liquid
A healthy liquid culture should usually remain fairly clear outside of the actual mycelial growth. Some sediment is normal depending on the nutrient source, especially with honey or malt extract, but the entire jar should not become uniformly milky or cloudy very quickly.
Possible signs of contamination include:
- Milky or overly hazy liquid
- Rapid cloudiness throughout the entire jar
- Oily, slimy, or strange-looking growth
- Green, black, pink, orange, or unusual colors
- Sour, rotten, or foul odors
One important thing to understand is that liquid culture can sometimes look healthy while still carrying hidden contamination. Because of this, many experienced growers test liquid culture on agar before using it on a large amount of grain.
A clean agar test is one of the best ways to verify that your liquid culture is actually clean before expanding it further.
Monitoring the Growth of Your Liquid Culture
Monitoring liquid culture is simple but important. You are looking for healthy white mycelial growth while also watching for signs of contamination.
In the first few days, it may look like nothing is happening. That is normal. Some cultures take longer to wake up, especially if started from spores. Liquid culture started from clean live mycelium often shows growth faster than liquid culture started from spores.
As growth develops, look for wispy strands, floating mycelium, or small cotton-like formations. Gently swirling the jar every day or two can help distribute nutrients and break up the mycelium, but avoid aggressive shaking unless your jar is designed for it.
If the liquid turns uniformly cloudy, develops strange colors, or smells bad when opened, it is best to discard it and start over. When in doubt, test a small amount on agar before using it on grain.
Troubleshooting Common Problems in Liquid Culture Development
Liquid culture is simple in theory, but a few common problems can happen along the way.
No visible growth: If your culture is not showing growth, check the temperature, nutrient recipe, and inoculation source. Spores can take longer to germinate than live culture. The inoculum may also be weak, old, or non-viable.
Slow growth: Slow growth can happen when temperatures are too low, the culture is too nutrient-rich, or the starting culture is weak. Most mushroom cultures prefer stable room temperatures and do not need excessive nutrients to grow well.
Cloudy liquid: A little sediment can be normal depending on the recipe, but fast, uniform cloudiness can be a sign of bacteria. This is one reason lower nutrient recipes and clearer solutions are preferred.
Darkened liquid after sterilization: This may be caused by caramelization. Sugary solutions can darken if sterilized too long or too hot. Stick with 15 PSI for about 15–20 minutes for most basic liquid culture recipes.
Contamination after inoculation: Contamination usually comes from the inoculation source, the environment, the needle, the injection port, or improper sterilization. Testing your liquid culture on agar before using it on grain can help catch problems early.
Do not get discouraged if your first attempt is not perfect. Liquid culture work takes practice, and every run teaches you something.
Harvesting and Storing Your Liquid Culture
Once your liquid culture has healthy visible growth, it can be drawn into a sterile syringe for later use. Focus on drawing from areas with visible mycelium, but avoid disturbing anything that looks unusual or contaminated.
Use a sterile syringe and needle, wipe the injection port with 70% isopropyl alcohol, and draw the liquid culture into the syringe. Label each syringe with the culture name and date.
Liquid culture is best stored in a cool, dark place. Many growers store finished syringes or jars in the refrigerator to slow growth and preserve the culture longer.
Before using stored liquid culture on a large amount of grain, it is always a good idea to test it on agar. This helps confirm that the culture is still clean and healthy.
Summary and Tips for Success with Liquid Cultures
Making liquid culture from scratch is a great skill to learn, but success depends on cleanliness, proper sterilization, and a balanced nutrient recipe.
Keep your nutrient solution light. More sugar does not always mean better growth. A simple 1–2% nutrient solution is usually plenty for healthy mycelium and helps keep the culture easier to inspect.
Always sterilize your liquid culture solution properly, work in the cleanest environment possible, and pay close attention to how the culture looks as it develops.
Most importantly, test your liquid culture on agar before using it heavily. Liquid culture can look clean while still hiding contamination, and agar testing is one of the best ways to protect your grain, genetics, and time.
With patience, clean technique, and the right recipe, liquid culture can become one of the most useful tools in your mycology workflow.