Introduction to Liquid Cultures
Liquid cultures sound like a fancy term, but in reality, they’re quite simple and crucial for anyone looking to dip their toes into the world of mushroom cultivation. So, what are they? They’re a method to grow mushrooms from a liquid medium, instead of solid agar or grain. Think of it as a nutrient-rich soup for your mushroom spores or mycelium to feast on, kickstarting their growth. This method is not only efficient but also accelerates the growth process, allowing for faster colonization when transferred to a solid substrate. Plus, it’s pretty straightforward to make one at home with just a few ingredients and equipment. Now, why bother with liquid cultures? They save time, reduce the risk of contamination, and are cost-effective in the long run, especially if you’re planning on growing multiple batches. Ready to get started? Let’s dive into the essentials of making your first liquid culture from scratch.
Essential Materials Needed for Making Liquid Cultures
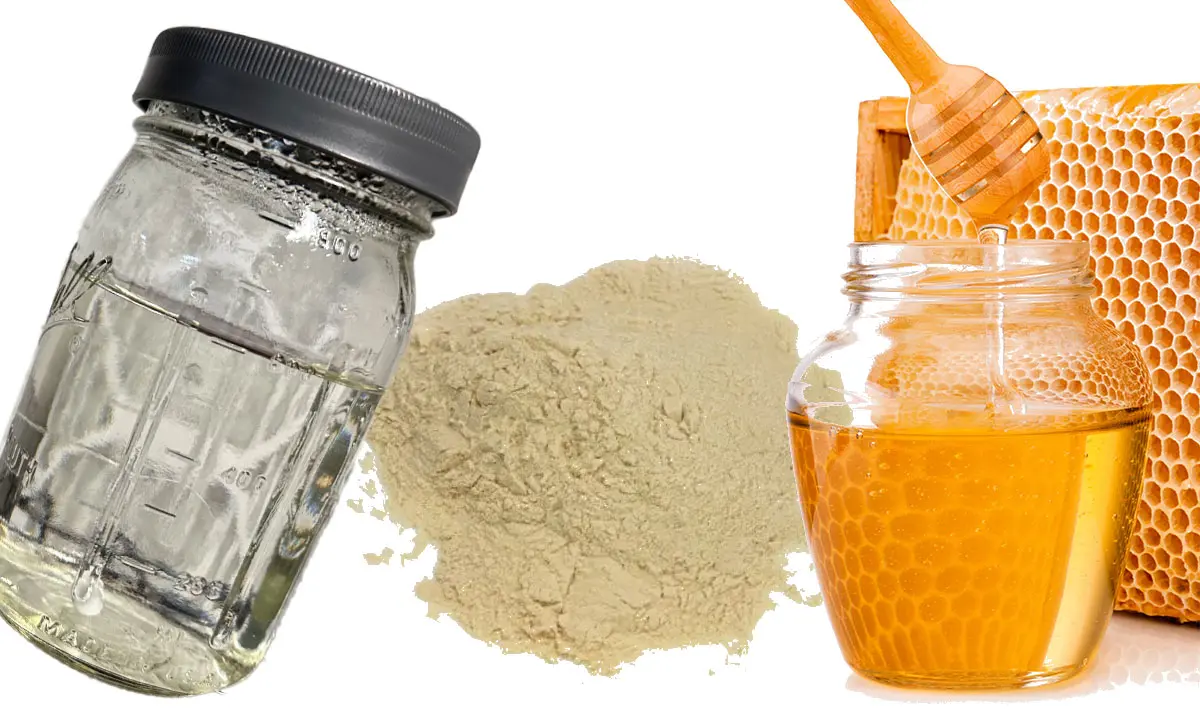
To start making liquid cultures, you need a few basic items. First, get yourself a syringe and needle; this is how you’ll introduce the culture to the liquid medium. You’ll also need jars or bottles to hold the liquid culture medium. Make sure they can be sealed tightly to keep out contaminants. The heart of the culture is the liquid medium itself, which usually consists of water mixed with nutrients like light malt extract or honey. These feed your culture as it grows. A pressure cooker is essential for sterilizing your jars, syringes, and needles, killing any unwanted bacteria or fungi. Lastly, you’ll need a still air box or a laminar flow hood to work in a contaminant-free environment when transferring your culture to the liquid medium. Each of these items plays a crucial role, so make sure you have them ready before starting.
Choosing the Right Nutrient Solution for Your Liquid Culture
To start your liquid culture, getting the nutrient solution right is crucial. This solution feeds your cultures, helping them grow strong and healthy. There are a few common options, and your choice will depend on what you’re culturing. Sugar-based solutions, often made with light malt extract or honey, are popular for their simplicity and effectiveness. They’re especially good for mushroom cultures. For beginners, a simple solution of 4% light malt extract in distilled water works wonders. If you’re into something a bit more advanced, potato dextrose broth is a step up, offering a richer nutrient profile. Remember, the goal is to provide a balanced food source for your cultures without overcomplicating things. Keep it simple, watch your culture flourish, and adjust as you learn what works best for your specific needs.
Preparing the Substrate for Your Liquid Culture
To kick things off, you’ll need to prepare the substrate for your liquid culture. Think of the substrate as the food your future cultures will feast on. The most common substrate used is a simple mixture of water and a food source, often light malt extract or honey. Here’s how to get it ready:
- Start with around 500ml of water. Tap water is fine, but if you’re worried about impurities, distilled water is a safer bet.
- Add 10 grams of light malt extract or 4% honey to the water. This isn’t an exact science, so a little more or less won’t hurt.
- Mix it well. You want the malt or honey completely dissolved in the water.
Now, it’s crucial to sterilize this mixture. Any unwanted bacteria or molds could spoil your culture, wasting your effort. Sterilization is typically done using a pressure cooker or autoclave:
- Pour your mixture into jars that can be sealed tightly. Mason jars work great for this.
- Seal the jars but not too tightly. You want to avoid pressure build-up that could lead to explosions.
- Place them in your pressure cooker or autoclave, and sterilize at 15 PSI for 15 minutes.
Remember, patience and cleanliness are your best friends in this process. Ensure everything you use is clean and sterilize your substrate properly to give your cultures the best start in their new home.
Sterilizing Equipment and Materials for Your Culture
Before diving into making your liquid culture, it’s crucial to understand that cleanliness is king. Sterilizing your equipment and materials is the foundation of success. Here’s the deal: every tool you use, from the jar to the syringe, must be as free from germs as possible. This process isn’t tricky but demands your attention.
First, gather your materials - jars, a pressure cooker, a metal spoon, and, importantly, a spirit lamp or alcohol burner. Next, put your jars and metal tools in the pressure cooker filled with water. Bring it to a boil and let it steam for at least 15 minutes. This kills most bacteria and spores that could ruin your culture.
Now, don’t just leave your tools out in the open after sterilizing. Keep them covered or inside the pressure cooker until you’re ready to use them. When handling, be quick and deliberate to minimize exposure to the air, which is loaded with microbes waiting to invade your project.
Lastly, the spirit lamp or alcohol burner is for flaming your needle or spatula right before you use it. This might sound a bit over the top, but in the world of cultures, this extra step is the difference between success and failure. Heating these tools until they are red hot kills any lingering germs that could have settled on them in the meantime.
Remember, when it comes to liquid cultures, cleanliness isn’t just next to godliness; it’s your best shot at avoiding contamination. So, take your time with this step. The effort you put in here lays the groundwork for the exciting part—watching your culture grow.

Inoculating Your Liquid Culture: A Step-by-Step Guide
First, let’s get your liquid culture off to a good start. Think of inoculation as introducing the good stuff, the microorganisms you want to grow, into your prepared liquid medium. Here’s how you do it step by step. Before anything else, make sure everything is sterile to avoid contamination. Sterilization is your friend here. Use a pressure cooker or steam sterilizer for your tools and containers. Next, grab a spore syringe or a culture from a reliable source. If using a spore syringe, gently shake it to distribute the spores evenly. Now, time for action. In a clean, still air environment - think of a glove box or a laminar flow hood if you have one, but a meticulously cleaned area can work for starters - carefully remove the needle cap. Insert the needle through the septum or the jar lid, whichever your setup has. Inject the spores or liquid culture into the liquid medium. Aim for the side of the jar to let the solution run down the glass, which makes it easier to see growth later. Use about 1 to 2cc of culture per jar. That’s generally enough. Pull the needle out and cap your container if it’s not already tightly sealed. Pat yourself on the back; you’ve just inoculated your liquid culture. Store it in a dark, warm place. Now, wait and watch as your culture grows over the next days or weeks, depending on what you’re growing. Simple, right? Remember, cleanliness and care are your best bets in this process.
Monitoring the Growth of Your Liquid Culture
Keeping an eye on your liquid culture’s growth is straightforward but super important. You’re essentially looking for signs that show your culture is alive and kicking. First off, look out for cloudiness in the liquid. This is a good thing. It means your microlife is growing. Now, don’t stress if it’s clear the first few days. Some cultures take a bit of time to get going. Another thing to watch for is tiny bubbles or strands floating around. These are your little guys doing their thing. If you see them, give yourself a pat on the back. However, beware of funky colors or bad smells. Green or black stuff? Not good. It means contamination, and you’ll need to start over. Keep your tools clean and your workspace tidy to avoid this mess. Just remember, monitoring your culture isn’t rocket science. Keep it simple, stay observant, and you’re on your way to success.
Troubleshooting Common Problems in Liquid Culture Development
When diving into the world of liquid cultures, you might hit a few snags along the way. It’s part of the learning process. Don’t sweat it. Here, we’ll talk about how to dodge those common hiccups. If your culture isn’t showing growth, first check your sterilization process. Any slip-up here can invite unwanted guests, like mold or bacteria, that throw a party at your culture’s expense. Make sure everything’s sterile, from your tools to the environment. If you’re seeing contamination, your sterilization game needs a level-up.
Another headache can be slow growth. This can happen if the temperature isn’t right. Most cultures like it cozy—too cold and they’ll nap; too hot and they’ll stress out. Find that sweet spot. Also, review the sugar in your mix. Too little and your culture won’t have enough to eat; too much and it can actually slow growth.
If your culture is clear as day, and you’re expecting signs of life, think about the source of your spores or inoculum. Not all sources are created equal. Some might be weak or even dead on arrival. Quality matters.
Lastly, if things are looking too cloudy, too fast, it could mean contamination or that your culture is partying too hard, using up resources too quickly. Adjust your feeding schedule and check for unwanted guests.
Roll with these punches, and you’ll be on your way to a thriving liquid culture. Remember, persistence is key.
Harvesting and Storing Your Liquid Culture
Once your liquid culture is buzzing with growth, it’s time to harvest. Use a syringe to gently suck up the culture. Aim for the thickest parts where the mycelium—the fungus’s equivalent of roots—is most visible. This process is like picking the ripest fruit from a tree. But remember, gentleness is key. You don’t want to damage the mycelium.
Storing your liquid culture is pretty straightforward. Think of it as storing a fine wine. You want a cool, dark place. The back of your fridge is perfect. Here, your culture can last for months, ready to be awoken at your command. Just label the syringe with the strain and the date. No fancy tools needed, just a marker will do.
In a nutshell, harvesting is about being gentle and precise. Storing is about keeping it cool and dark. Stick to these rules, and your liquid culture will be ready for action whenever you are.
Summary and Tips for Success with Liquid Cultures
Starting your liquid culture is thrilling but demands attention to detail. Remember, cleanliness is the cornerstone. Always work in a sterile environment to avoid contamination. Use a pressure cooker or an autoclave to sterilize your tools and substrates. This kills any unwanted bacteria or fungi. Choosing the right sugar source, such as honey or malt extract, fuels the growth of your culture, but don’t overdo it. Too much sugar can inhibit growth or encourage unwanted competitors. Agitate your culture regularly to distribute nutrients and oxygen evenly, promoting healthy growth. Finally, patience is key. Cultures grow at their own pace, so give them the time they need. These tips might seem basic, but they’re the foundation of successful liquid culture cultivation.


